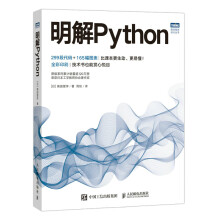


《移动开发经典丛书:iOS 高级编程》主要内容:
·讲解如何利用动作视图和警告视图,与应用的用户进行交互
·为添加多媒体和包含本地化技巧提供小提示
·演示如何使用可用的不同框架来播放和录制音频与视频
·覆盖创建通知,发送邮件,请求访问权限,以及为你的应用整合Facebook和Twitter
·讨论如何实现用量分析和从应用获利
·显示如何使用iTunesConnect发布应用,并且在AppStore上分发
向下一代iOS应用开发前进,你准备好了吗。
伴随着应用的下载量超过5百万,而且这一数字仍在增长,应用开发可以说是获利颇丰,但是你必须能够脱颖而出。为此,你的应用需要集成高级功能。
通过利用可用的iOS框架,使用现代的Objective-C编程规则的方式,《移动开发经典丛书:iOS 高级编程》将逐步引导你创建高级iOS应用。贯穿全部章节,你将发现70个贴合实际的示例程序,你可以下载这些示例并以此为起点。使用本指南,你将能够创建最前沿的应用,并为发布到App Store做好准备。
2.1理解UITableView
UITableView直接继承于UIScrollView类,从而给它带来直向(译者注:横向和纵向)滚动的能力。当想要使用UITableView时,必须首先创建UITableView类的实例,将它指向UIView控件而使其可见,并且建立一个datasource对象和一个负责与UITableView进行交互的delegate对象。
2.1.1datasource和delegate
每一个UITableView都需要datasource和delegate这两个对象。datasource对象为UITableView提供数据。通常,datasource对象使用NSArray类或者NSDictionary类在内部存储数据,并且根据需要将数据提供给表视图。delegate对象必须实现UITableViewDelegate和UITableViewDataSource这两个协议。
UITableViewDelegate协议定义了几个方法,delegate对象需要实现其中至少三个方法。
delegate对象必须实现的方法有:
●tableview:numberOfRowsInSection:
●numberOfSectionsInTableView:
●tableview:cellForRowAtIndexPath:
启动Xcode开发环境,使用SingleViewApplicationProject模板创建新项目,并使用如图2-1中所示的配置将其命名为PlainTable。
图2-1
使用InterfaceBuilder工具打开YDViewController.xib文件,并将一个UITableView控件添加到该窗口中。使用AssistantEditor工具为这个UITableView控件创建一个属性。也需要设置ReferencingOutlets一栏中的datasource和delegate指向UITableView对象。确保YDViewController.xib文件看起来如图2-2中所示。
打开YDViewController.h文件,创建名为rowData的NSMutableArray对象充当datasource,如代码清单2-1中所示。
图2-2
代码清单2-1Chapter2/PlainTable/YDViewController.h
#import<UIKit/UIKit.h>
@interfaceYDViewController:UIViewController
@property(weak,nonatomic)IBOutletUITableView*mTableView;
@property(nonatomic,strong)NSMutableArray*rowData;
@end
打开YDViewController.m文件,实现如代码清单2-2中所示的代码,关于这段代码,会在代码清单后详细说明。
代码清单2-2Chapter2/PlainTable/YDViewController.m
#import“YDViewController.h”
@interfaceYDViewController()
@end
@implementationYDViewController
-(void)viewDidLoad
{
[superviewDidLoad];
//Doanyadditionalsetupafterloadingtheview,typicallyfromanib.
[selfloadData];
}
-(void)loadData
{
if(self.rowData!=nil)
{
[self.rowDataremoveAllObjects];
self.rowData=nil;
}
self.rowData=[[NSMutableArrayalloc]init];
for(inti=0;i<100;i++)
{
[self.rowDataaddObject:[NSStringstringWithFormat:@“Row:%i”,i]];
}
//nowmydatasourceifpopulatedlet‘sreloadthetableview
[self.mTableViewreloadData];
}
#pragmamarkUITableViewdelegate
-(NSInteger)numberOfSectionsInTableView:(UITableView*)tableView{
return1;
}
-(NSInteger)tableView:(UITableView*)tableView
numberOfRowsInSection:(NSInteger)section{
return[self.rowDatacount];
}
-(UITableViewCell*)tableView:(UITableView*)tableView
cellForRowAtIndexPath:(NSIndexPath*)indexPath{
staticNSString*CellIdentifier=@“Cell”;
UITableViewCell*cell=(UITableViewCell*)[tableView
dequeueReusableCellWithIdentifier:CellIdentifier];
if(cell==nil){
cell=[[UITableViewCellalloc]initWithStyle:UITableViewCellStyleDefault
reuseIdentifier:CellIdentifier];
}
cell.selectionStyle=UITableViewCellSelectionStyleNone;
cell.textLabel.text=[self.rowDataobjectAtIndex:indexPath.row];
returncell;
}
-(void)tableView:(UITableView*)tableViewdidSelectRowAtIndexPath:
(NSIndexPath*)indexPath
{
[tableViewdeselectRowAtIndexPath:indexPathanimated:YES];
}
-(void)didReceiveMemoryWarning
{
[superdidReceiveMemoryWarning];
//Disposeofanyresourcesthatcanberecreated.
}
@end
下面对这段代码进行分解,向你解释代码中各方法的作用。
在viewDidLoad方法中,调用了本地方法loadData,该方法创建了一个带有100个记录的NSMutableArray对象,并将reloadData消息发送给self.mTableView对象。
reloadData方法迫使mTableView对象通过调用delegate方法重新加载数据,并更新用户界面。
在#pragmamarkUITableViewdelegate标记语句之后,需要实现表视图运行所必须的delegate对象的最小方法集合。
调用numberOfSectionsInTableView:这个delegate方法来决定UITableView控件的section的数量。如果使用UITableViewStylePlain风格,UITableView控件的section数通常是1。后面将会学习到带有下钻功能的例子,如果使用例子中那种风格的section,则需要返回实际的section的数量。
第Ⅰ部分 开发高级UI
第1章 创建Personal Library
1.1 创建Personal Library
1.1.1 项目基础知识
1.1.2 启动新项目
1.1.3 配置项目
1.1.4 定义常量
1.1.5 使用配置文件
1.1.6 导入头文件
1.2 注册——登录
1.2.1 创建注册逻辑
1.2.2 初始化数据
1.2.3 初始化应用的默认设置
1.2.4 创建登录逻辑
1.2.5 保护密码的安全
1.2.6 在keychain中存储密码
1.3 崩溃管理
1.3.1 理解崩溃
1.3.2 实现崩溃处理程序
1.4 本章小结
第2章 Tableview进阶指南
2.1 理解UITableView
2.1.1 datasource和delegate
2.1.2 滚动
2.2 构建聊天视图控制器
2.2.1 构建datasource
2.2.2 构建聊天数据对象
2.2.3 构建定制的UITableView控件
2.2.4 灵活的单元格高度
2.2.5 开发定制的单元格
2.2.6 创建聊天用户对象
2.2.7 融会贯通
2.3 UITableView的下拉功能
2.3.1 实现UISearchbar
2.3.2 添加字母表索引
2.4 本章小结
第3章 Map Kit框架
3.1 模拟iOS设备的位置移动
3.1.1 为何需要一个GPS模拟器
3.1.2 创建模拟器
3.1.3 使用Google Maps创建GPS路线文件
3.1.4 实现YDLocation-Simulator类
3.2 使用标记
3.2.1 创建定制的标记
3.2.2 响应标记的批注
3.2.3 标记群集
3.3 本章小结
第4章 Action View和Alert概述
4.1 请求用户输入
4.2 使用多个选项创建UIActionSheet
4.3 呈现UIActionSheet
4.3.1 使用showInView方法来呈现
4.3.2 使用showFromTabBar方法来呈现
4.3.3 使用showFromBarButtonItem方法来呈现
4.3.4 使用showFromRect方法来呈现
4.3.5 使用showFromToolbar方法来呈现
4.3.6 用户输入的响应
4.3.7 处理用户选项
4.3.8 扩展UIAlertView
4.3.9 在UIAlertView上添加UITextField
4.4 本章小结
第5章 国际化:为全世界构建应用
第6章 多媒体的使用
第Ⅱ部分 网络和数据处理
第7章 使用Web服务和解析
第8章 使用FTP
第9章 实现Core Data
第III部分 集成应用
第10章 通知
第11章 发送电子邮件、SMS和拨打电话
第12章 了解Address Book
第13章 事件编程
第14章 与社交媒体集成
第Ⅳ部分 将应用运用到生产环境中
第15章 分析应用
第16章 从应用中获利
第17章 了解iTunes Connect
第18章 构建与发布
附录A 音频代码
附录B 图片尺寸